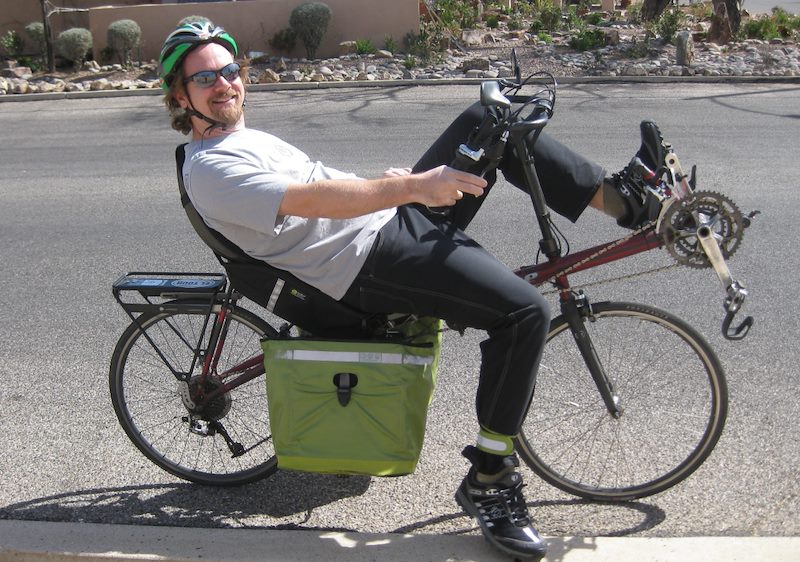
Another year of bicycle commuting! 2010 was my first full year of commuting on a recumbent – what a beautiful way to commute!
I 2010 I rode more miles than any previous year - in part because I am doing more long rides and in 2010 participated (for the first time) in El Tour de Tucson (66 mile).
2010 was the happiest I have been on a bike – some particularly great points for me about riding my recumbent:
- Comfort - I have had basically no issues with my hands, knees, shoulders, neck or back and spent a minimal amount of time tweaking my setup. Not everyone has the same experience but for me this has been fantastic!
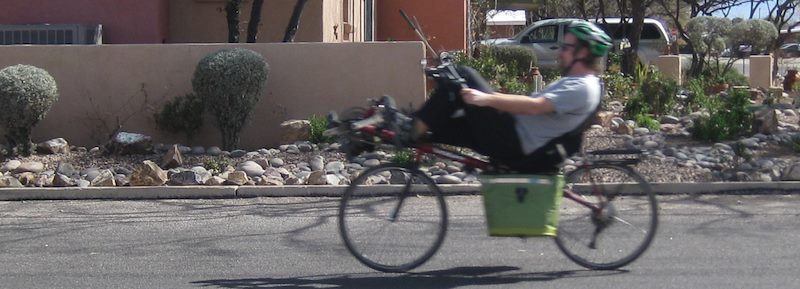
- Performance – there are plenty of bikes/designs that are going to be lighter and have better performance than my bike – but I can keep up with my cyclist friends without any problems – that is enough for me! The balance between performance and comfort on my recumbent is great and it is safe to say that the primary factors limiting my performance are fitness and technique, not my bike...
- Great Commuting AND Recreational Setup - underseat racks for good cargo positioning, rear rack for bulky loads and extra panniers, high enough seating position to be seen by cars and a comfortable ride all make this a great commuter - comfortable position, decent performance and recumbent specific hydration and seat bags all make this a great setup for longer recreational rides!
The points above are awesome and you should now be thinking about your new recumbent - but nothing is for everyone and if you have not owned a recumbent before the points I made last year still seem worthy of consideration and are repeated here:
- You won’t be hopping curbs with this style bike – it is not for every style of riding…
- Parking can be slightly more complicated (not much, but squeezing into a crowded rack is harder or maybe even impossible depending on the style of rack).
- Get ready to be noticed! You are NOT going to blend in and if questions, comments, strange stares, shouts, laughter and fun conversations are not your cup of tea you will be better off with another bike.
- I have not found many very tire choices for wider tires for the 650c wheels that come on many Volea models (skinny racing tires are no problem…) – you might consider choices such as the Volae Expedition/Expedition Pro instead of the Volea Sport for 26” wheels/more tire options.
To those points I would add:
- More bike = more to clean and maintain: long chain, long cables, bigger frame and unique setup equal more time spent on routine cleaning and adjustments (this is obviously subjective and partly about my skills – but there is just more to clean…)
- Fewer Experts: Any good bike mechanic will be familiar with the vast majority of parts on a recumbent and your local bike shop can certainly do great routine work for you. But when you have recumbent specific questions about clothing/components/gear or want an awesome tune-up to make everything perfect it may be harder to find local experts. However, it is important to remember that there are great sources of information on the internet and that finding a shop that you love, trust, understands you, is conveniently located and has great service is (in my opinion) very very very hard no matter what style of bike you have...
Recumbent Information
There are some great resources on the web for recumbents - these are some of my favorites:
'BentRider Online (articles, information and active forums)
Recumbent Journal (articles and information)
rbent - Recumbent Bike Enthusiasts of North Texas (active forums)
Recumbent and Tandem Rider Magazine (print magazine)
VeloVision Magazine (not specifically recumbent focused but some great coverage)
Tucson Cycling Links
Tucson cycling links could take up an entire post but I couldn’t resist including a few useful favorites:
Tucson Velo (great news coverage for Tucson cycling across a wide range of interests/issues – this is a great resource and reading this will lead you to a huge array of other Tucson cycling sites/information)
There & Back Bicycles (a recently opened Tucson bike shop with a focus on commuter bikes/products and great service – no recumbents but highly recommended)
Ajo Bikes (if you want to try a recumbent in Tucson this is the place to go – they often have some nice deals on used ‘bents in addition to a selection of newer bikes)
Spoke6 (maybe a slight stretch for a cycling link – but if you ever work remotely and need a great space with great company and great indoor bike parking this is certainly the place to go!)
Living Streets Alliance (A newer organization whose goal “is to promote healthy communities by empowering people to transform our streets into vibrant places for walking, bicycling, socializing, and play.”)
Tucson Metro Bike Map (invaluable for exploring Tucson by bike!)
Gear!!
Bike
Volea Sport (used since mid 2009) - The Volea Club is the closest current model to my Sport. This is the only recumbent I have owned so I can't give any meaningful comparison to other bikes/brands - but I love this bike and Volea has great customer service! If I bought a new bike today there is a VERY good chance I would buy another Volea, but if I was going to compare other brands I would also check out Bacchetta (a variety of options), Carbent (performance oriented bikes starting at about $5,000) and the Catbike Mushashi (if I was not looking for a commuter).
Cargo
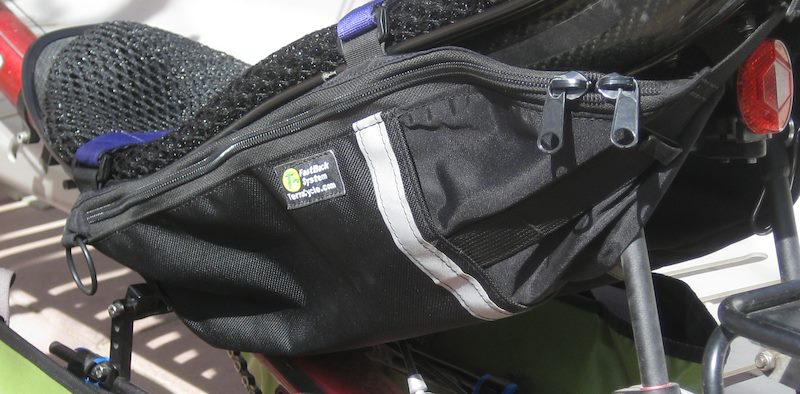
TerraCycle FastBack Double Century Hydration Pack (used since mid 2010): This bag straps nicely to my carbon fiber seat and is a great addition for carrying hydration bladders and other small items. The shape of the bags can make loading some items awkward (depends on the shape - bulky items or even my favorite hydration bladders (Platypus Big Zip SL 2L) can be tough) - but with a little effort these bags yield a nice amount of storage. For long rides I am currently loading a 2L hydration bladder in each bag, both slightly under filled to make it easy to also fit in my pump (Topeak Road Morph G) and some snacks. The only down side I have found with these bags is that the great set of straps used to secure the bags make it a little too slow/fussy to take off/put on when switching from commuting to recreational rides - a bit of a dilemma (especially given the price of the bags) that I am still not sure how I should solve. When I first received these bags I tried loading a bladder in one bag and everything else I wanted for a ride in the other - but found I could not fit everything - leading to the purchases below...
TerraCycle FastBack NorBack Frame Bag (used briefly mid 2010): This is a nicely made bag and I love the idea of using the space under the frame for additional storage. Unfortunately the bag was a little tricky to position on my bike - the length of the bag combined with my underseat rack, seat mount and cables conspired to make taking the bag on and off slightly tricky. If this bag was going to stay on my bike all the time the tricky on/off would not be an issue - but I did not want it attached for every day commuting.
Bent Up Cycles Aero Bag (used since late 2010): After finding that the Norback bag was not for me I looked at several other bags and eventually purchased the Bent Up Cycles Aero Bag. This bag is great! It fits quickly and easily over my seat back with a single strap/buckle to help secure it. It easily swallows repair kit, cable lock, wallet, phone, extra food and a jacket - perfect for both longer rides and for casual commute days when panniers/change of clothes/computer are not required. The bag holds its shape very well – which is great but does mean that with just a few loose items in the bags items bounce around and tend to be quite noisy… But in that scenario using the small zippered pouches (included with the bag) that velcro to the inside is an easy way to solve the problem. This bag has quickly become a favorite of mine and I love that it is both secure while riding and very easy to put on/take off.
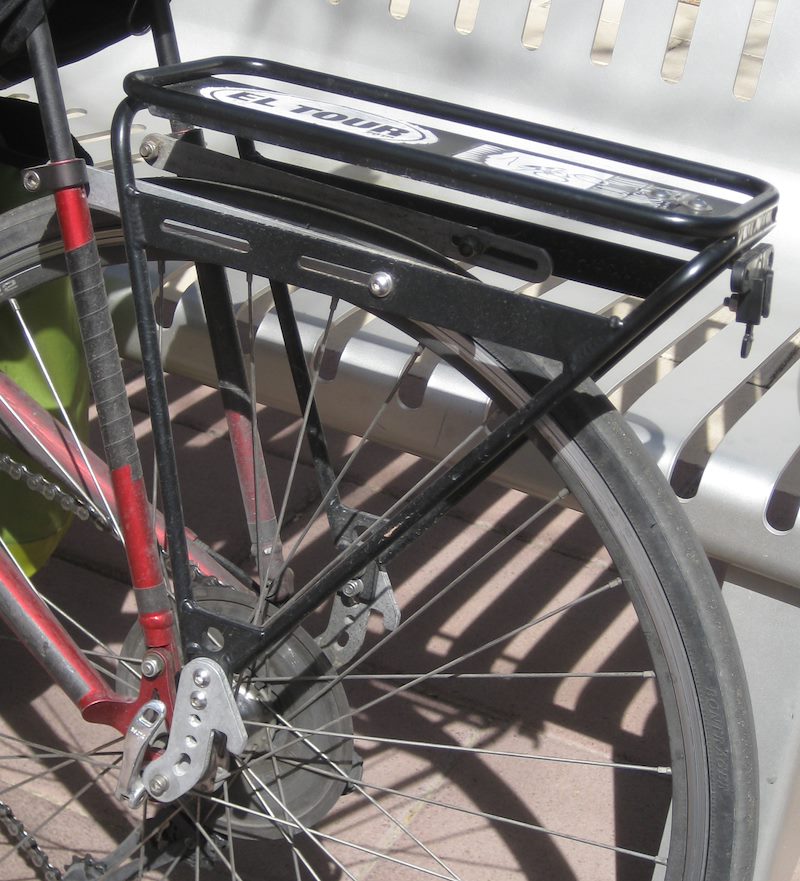
Old Man Mountain Sherpa Rack (used since late 2010): When I purchased my Volea I had an inexpensive rear rack put on and it worked quite nicely. Most days I use my underseat racks and panniers - the rear rack sees only occasional use (packages, odd shaped items, etc...), but because it lets me carry items that I would otherwise have to use the car to transport it is an important part of my setup. The generic rack made adjusting the seat a hassle (because it clamped to the seat stays) and I became curious about the Sherpa rack that the Hostelshoppe offers because it has an adapter to use the seat stay clamps as the forward mounting point. This seemed like it would solve the seat adjustment problem and - while likely overkill for my use/problem considering the price - I purchased one in late 2010. The seat stay adapter is a nice solution and it makes the connection to the seat stays cleaner and the seat easier to adjust (the extra hardware on the clamp to hold the seat stay tends to take a little extra fiddling when adjusting the seat angle – so it is still not as easy to adjust as without a rear rack). The quality of the rack is great, there are nice bungee attachment points, the mounting brackets accommodate disc brakes and there is a good chance it could be moved to another bike without much effort. As a commuter I wish this rack had an integrated light mount. There is a single hole in the deck of the rack and I tried using that to attach a Jandd mounting bracket - but found that the resulting vibrations were annoying. Eventually I resorted to drilling a second hole in the deck to more firmly attach the Jandd mounting bracket - this solution is about 98% of what I would like but it is still noisier on rough roads than I would like. I think with a little more tweaking and I can make it quiet - but I would have preferred an integrated light mount... Overall the rack was a nice purchase, but for my needs the inexpensive rack did nicely also.
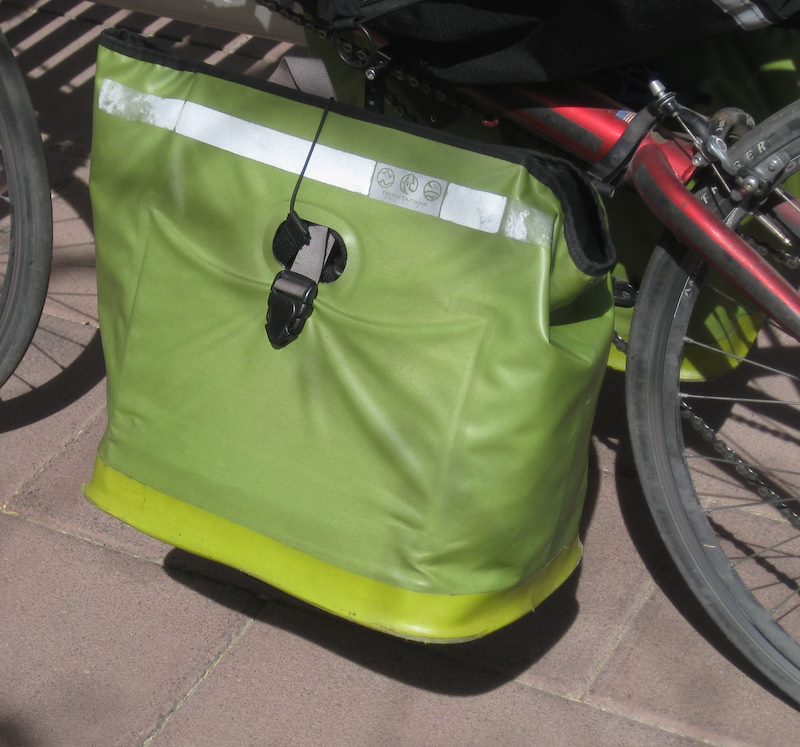
Pacific Outdoor Equipment Co-ops (used since late 2009) – I am happily using my original pair of Pacific Outdoor Equipment Coops. Large open bags are a great choice for use in Tucson, especially if you stash some light weight waterproof dry sacks in your bags for the occasional rainy day (I am using several Sea to Summit Ultra-Sil Dry Sacks that I purchased in 2009). Both Co-ops have developed small holes in the outer material at the bottom outer corners - but because your items sit in an inner lining (not against the outer material) this has not impacted the usability of the bags.
Terracycle Easy Reacher Rack (used since late 2009) - These have definitely made commuting more enjoyable! This rack positions the your panniers under you which really makes a nice difference in ride/handling compared to putting your panniers on the rear rack. It also makes it quick to access your panniers without getting off the bike. This rack has not given me any problems - highly recommended!
Mirrors
D+D Oberlauda Ultralight Bike Mirror (used since mid 2010): I am currently using this as my primary/right side mirror – easy to attach, easy to adjust and is great at giving you a very wide rear view. I originally tried this as my primary/left side mirror but I found that it makes things a little smaller than I am am comfortable with for the left side, but as a secondary/right side mirror it is great!
Mountain Mirrycle Mirror (used since mid 2010): This is my current primary/left side mirror – good field of view and a size that makes cars easy to see. I find this mirror slightly finicky to adjust, but it is so good that it just doesn’t matter!
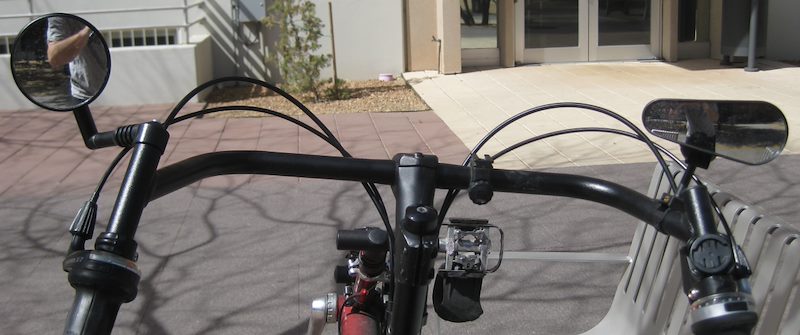
Busch & Müller Cyclestar Mirror – Short (used mid 2009 to mid 2010): Easy to adjust and easy to position.I liked using these mirrors but I found that the larger size and bigger field of view of the Mountain Mirrycle made it a better choice for my primary mirror and the extremely wide field of view of the D+D Oberlaude Ultralght Bike Mirror made it a better choice as my secondary mirror.
Tires
Terry Tellus PT Tire 650 x 28C (28-571) (used late 2009 to late 2010) [not currently on the Terry site but available at the Hostelshoppe]– As far as I know this is the cushiest 650c tire that you are going to find - and on my bike the largest tire that would fit in the frame. These tires are a nice compromise of fat enough to feel good with some weight/cargo and skinny enough not to feel too slow. One downside was that I averaged about one flat every three weeks (sometimes I had better luck/sometimes worse). I found that using a tire liner helped and Specialized Standard Road LVS tubes might have made a slight difference (these are some of the only tubes I have seen where the manufacturer claims 20/28 in a 650 - it might be my imagination but these seem like they do just slightly better than other tubes I tried).
Bontrager Racelite Hardcase 650x25 (used since late 2010) – For the El Tour de Tucson I wanted to try a slightly skinnier tire, but I was not thrilled about going back to the Ultra GatorSkin 650x23C that were on the bike when I bought it. I decided to try the Bontrager Racelite Hardcase 650x25 - these are skinnier than the Tellus PT Tire mentioned above and, as you might expect, the ride is more jarring. However, unlike the Ultra GatorSkin these do quite nicely with a commuting load and seem to be a nice mid-point between the Tellus PT Tire and Ultra GatorSkin. The unexpected benefit has been the flat prevention - I think I have had one flat so far in 2011 - a noticeable improvement over both the Tellus PT Tire and Ultra GatorSkin. While I occasionally miss the extra cush from the Tellus PT Tire these have remained on my bike because of the (so far - cross your fingers) remarkable flat protection.
Other 650 x 25 options (not used): These are mentioned here because I have found it difficult (and slightly frustrating) to find 650c tire choices wider than 23 – I have not used any of these and have not even seen any of these in person… Bontrager currently lists the Bontrager Race Lite , Bontrager Race X Lite AC and Bontrager Race X Lite in 650x25 (as of 2/26/2011 these models seem to be in-stock and on-sale - great deals but I hope it does not mean that these choices are going away). I also recently noticed that Panaracer lists the Pasela (from their Urban line) in 650x25.
Light
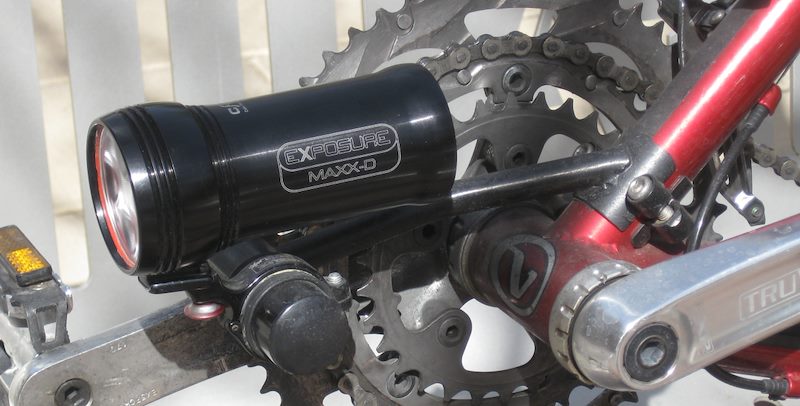
Exposure Maxx D (used since mid 2009) current version: : It is amazing how nice it is to have a bright high-quality light that does not need an external battery pack - quick and easy to get on/off the bike and with no cables/pack to figure out where to rig on the recumbent - perfect for commuting. I have occasionally had to switch from the hi setting to the medium setting on very hot nights in stop-and-go traffic to avoid overheating the light when it is not getting enough airflow – but the Medium setting is very bright and I have not found this to be an issue. The mounting bracket for the light does not have the vertical adjustability that some mounts have, this may require slightly more time/fiddling when you first set the light up - but once you have it setup I doubt you will miss the adjustability. In addition to being a great light the support crew at Ibex Sports (the distributor for Exposure Lights) is fantastic - it is always great to talk to people who actually use the products they sell! With any light I think it is worth having a second charger for convenience (one at home/one at work) – and I was glad when Exposure added a USB “Top-Up” Charging cable to their line (small enough to fit in my tool bag to allow for impromptu charging without having to carry around a wall charger).
OAB (One Armed Bandit) Light Mount (used since late 2010) - For most of 2010 my light was mounted on may handlebars - that setup worked well. The position on the handlebar did result in shadows from my feet/front of the bike, but the Maxx-D generates enough light that this was really never an issue. In late 2010 I found and purchased the One Armed Bandit and it has turned out to be an amazing light mount. This mount puts the light far enough out in front of my bike that there is virtually no shadow from your feet (and no reflection from your cranks) putting more light on the road. One downside to this setup – mounting the light on the handle bar was occasionally nice because when going around a tight corner it would put more light where you are going rather than putting all the light where the front of the bike is currently pointing, but the difference is minor.
Cat Eye SL-LD100 (used since ?2007) – on my helmet for a little additional visibility, this light is not outstandingly bright but the size and attachment make it very versatile.
Cateye HL-EL010 Uno Headlight (used since mid 2010): Single battery, single LED, small enough I don’t mind fitting it in my toolbag – this backup light has saved me a couple of times and having it always in my bag has really paid off. Don’t expect too much brightness, best as a backup when being seen is crucial.
Bright Bike (used since early 2010): This project and the related kits are a set of materials, suggestions and instructions for adding reflective vinyl to your bike. This does not replace reflectors and lights – but the simple added reflectivity/visibility is a great idea and I applied the black reflective vinyl to a number of spots on my bike.
I have also used a variety of rear lights all of which are slightly underwhelming and not really worth mentioning...
Office
I am still using my Lenovo X-61 Tablet and while my phone replaces it some days it is still with me for quite a few commutes. I have not had and problems with carrying it in my panniers in my Tom Bihn Horizontal Brain Cell. The Tom Bihn Horizontal Freudian Slip - mentioned last year – is also almost always in my bag to provide a bit of organization.
Seat
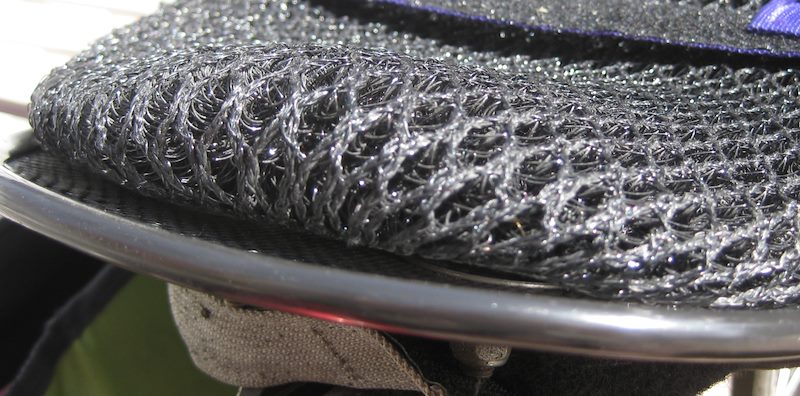
Ventisit (used since late 2010) - The seat pad that came with my Volea was cushy and easy to attach/detach - but after a year and a half of being parked in the Tucson sun the top layer of open cell foam started to crumble – I found the Ventisit recommended as a more breathable alternative. Compared to the stock Volea seat pad the Ventisit is more breathable and does a better job of not holding water when it rains. The extra ventilation is especially appreciated - although don't expect any miracles, in hot Tucson sun your back will still get sweaty! The Ventisit offers less padding than the stock pad (not a problem so far for me but it is noticeable) and is more complicated to attach (there are plenty of options for attachment - but none are as easy as throwing some velcro against the closed cell foam of the stock pad). I like the Ventisit pad a lot – it will be interesting to see how it holds up...
Pedals
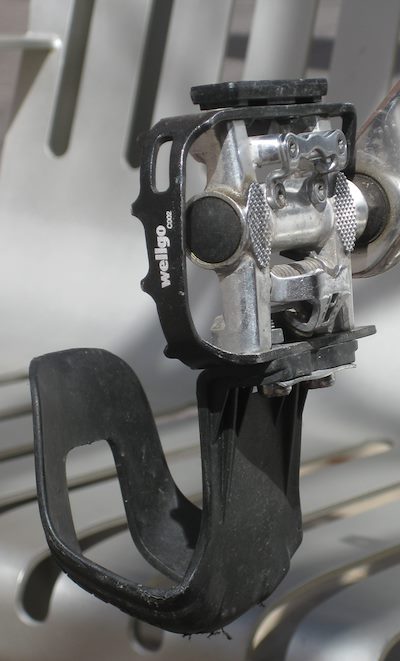
Wellgo C002 City Comfort Pedals (used since late 2010): Inspired by ADT’s change to clipless pedals I added these to my bike in late 2010. I thought that it was going to be a fairly brutal transition and thought that having my feet farther from the ground would make clipless pedals a bit more of a challenge on my recumbent – but my fears were completely unfounded. While these took a little practice it actually worked out to be a fairly easy adjustment – I think that the two factors that made it easy were that you are setup to easily look at your feet (taking a little of the guess work out of clipping in) and that the recumbent forces you to be adapt to having your feet higher off the ground (even with normal pedals you have a relatively long ‘delay’ getting your foot down). Since my bike is frequently used for commuting I was happy to add a pedal that would be nice for use with ‘regular’ shoes and was glad I could add the toe-clips listed below to them (the toe-clips are practical for regular shoes and have the added benefit of weighting the pedals so they are nicely positioned to clip into).
Zefal Toe-Clips (used since late 2009): Toe-clips are not going to add very much to the efficiency of your pedal stroke, but they are a great way to add some control of the positioning of the pedals – a welcome addition for stop and go positioning.
Clothing
Less bike specific items than you might see in many cycling related lists - but since traditional bike gear tends to have pockets on the back (not functional or comfortable on a recumbent) I generally look elsewhere for clothing. These are the pieces that I am using most frequently:
Montane Featherlite Smock (used since early 2011): A nice high visibilty wind breaker - nice reflective hits and takes up very little space – simple and good!
Icebreaker Long sleeve Top (used since early 2008): This top is has gotten quite a bit of use because it provides an incredibly practical amount of warmth in Tucson. It is all the warmth I need most of the year – and for colder days usually all I need if I combine it with a shell. Not a current model but quite like the current 260 weight pieces.
Outdoor Research Flurry Gloves (used since late 2009): Heavier weight Wool/Fleece gloves with nice durability, I use these infrequently on colder days and have rarely wanted anything warmer.
Outdoor Research StormTracker Gloves (used since late 2010): I added these late in 2010 on what were - for Tucson - some extremely cold days. I don't think these will get much use but they provided some welcome relief from painfully cold hands this winter!
Manzella Hatchback Gloves: Fleece with a high visibility shell that stows into the back of the glove. These are in my bag most of the time since they are good all around weight in Tucson.
Marmot DriClime Helmet Liner: Not too bulky under my helmet and provides enough warmth for any time of the year in Tucson - a favorite.
Outdoor Research Swift Cap (used since mid 2010) - Used for extra rain protection for my glasses and face, fits fairly easily under my helmet.
Bacchetta X-Eyed X-Pocket Jersey (used since mid 2010): Pockets on the front - where they belong!
Always love new ideas – if you have any suggestion please share by leaving a comment!
CM